Find more customers with
Names Lexicon Ads
Create ads to reach your goals, from getting discovered and connecting with customers to inspiring them to buy.
Advertisers guide
Step 1
Account Setup
- Go to advert.nameslexicon.com to sign up on the advertorial page.

- On the Sign up page, you will be required to fill in your username, email and password then click on the registered button.
- You will be directed to verify your email address before you are redirected to your ad dashboard.
- If you already have a Names Lexicon account, please click on the “Sign in here ” link so that you will be taken to the sign in page to Sign in with your credentials.
Step 2
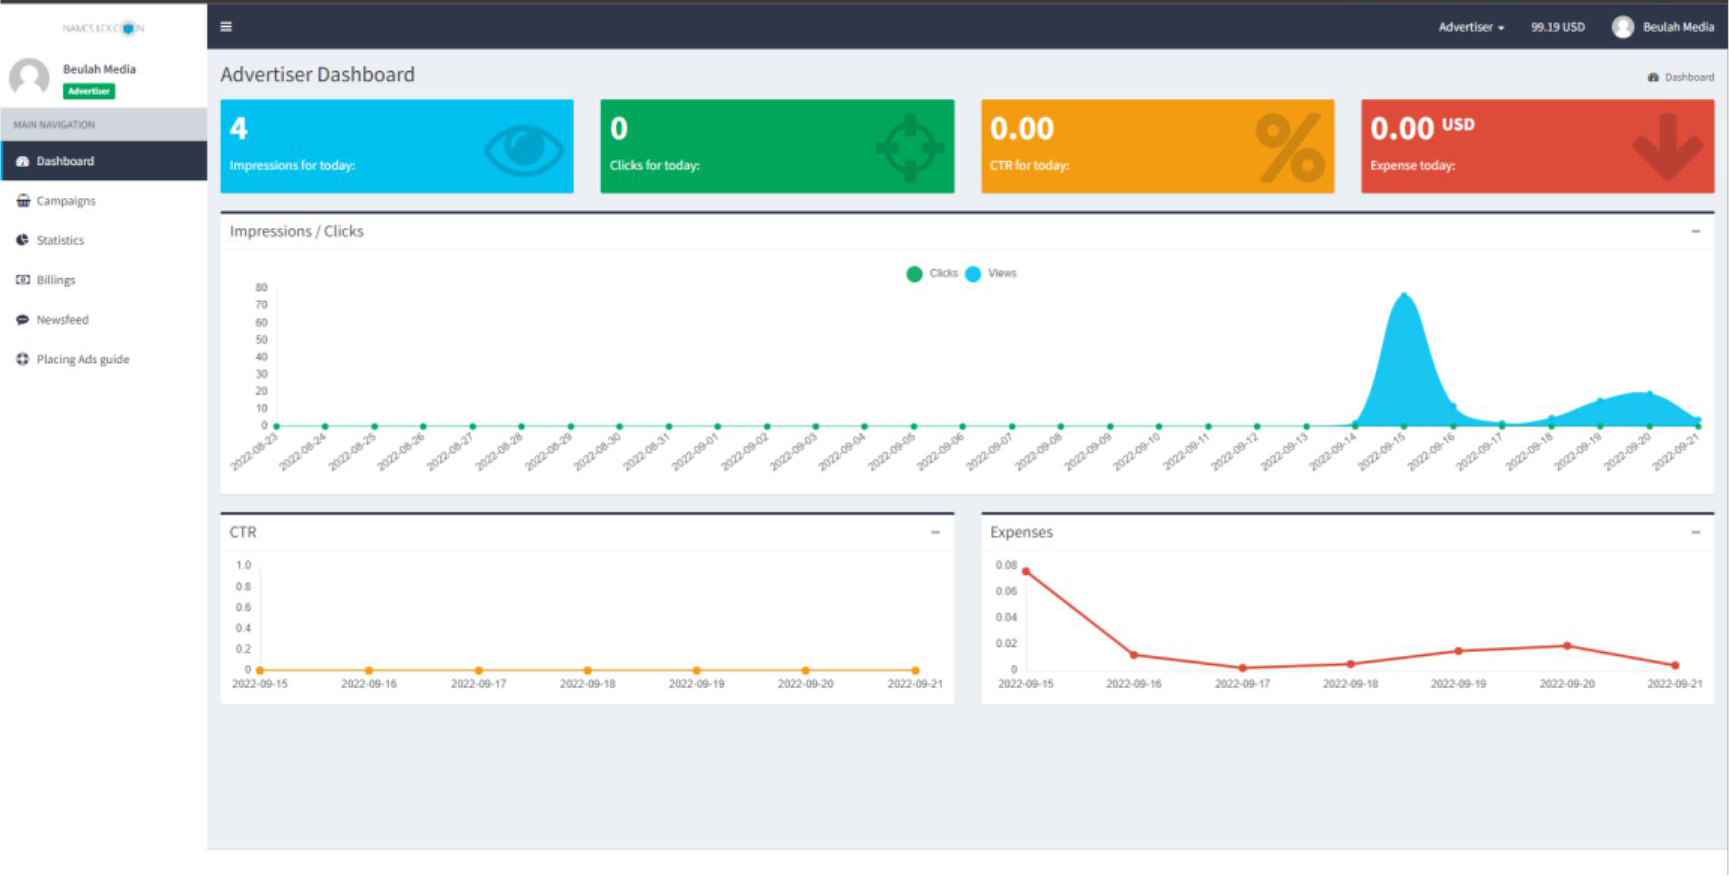
On logging into your dashboard, you will have access to the advertisement dashboard so you can post your new ads to be approved and viewed by various users.
On the landing dashboard, you get to see various statistics for the various ads that are being placed and you can as well go n to fund you account if you don’t have any funds and you want to place an ad.
Step 3
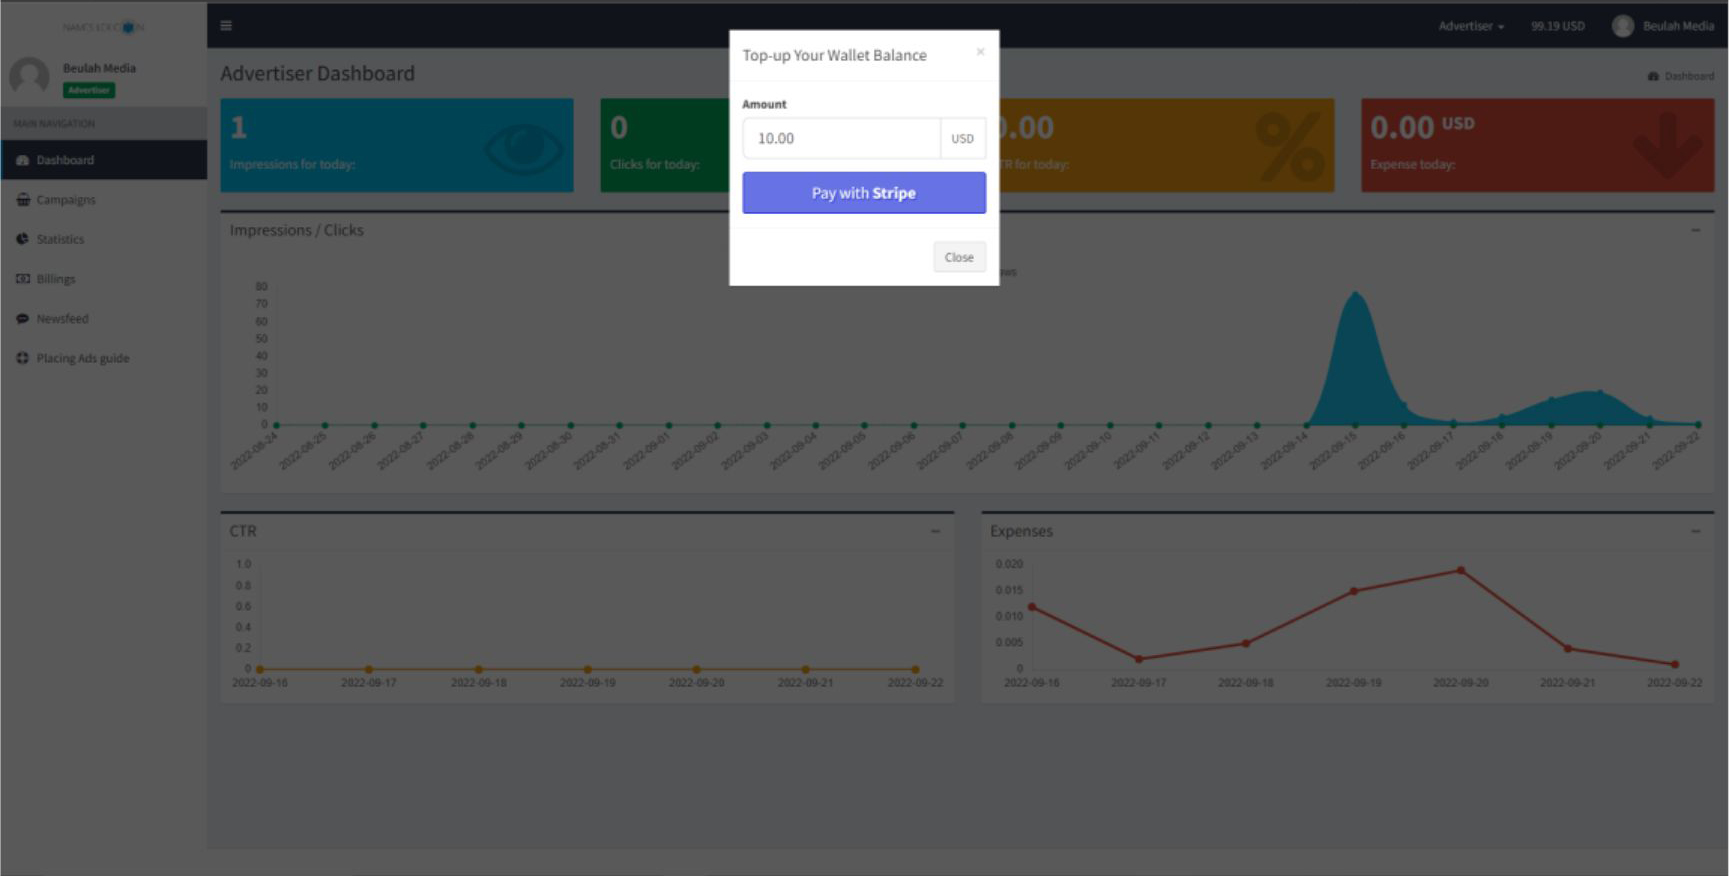
To place an ad, click on the top right corner before your profile image that connotes the amount remaining in your wallet.
Then click to add more funds to your wallet balance. The funds in your wallet alows you fund your advertorials on the Names Lexicon ad
platform as an advertiser.
Step 4
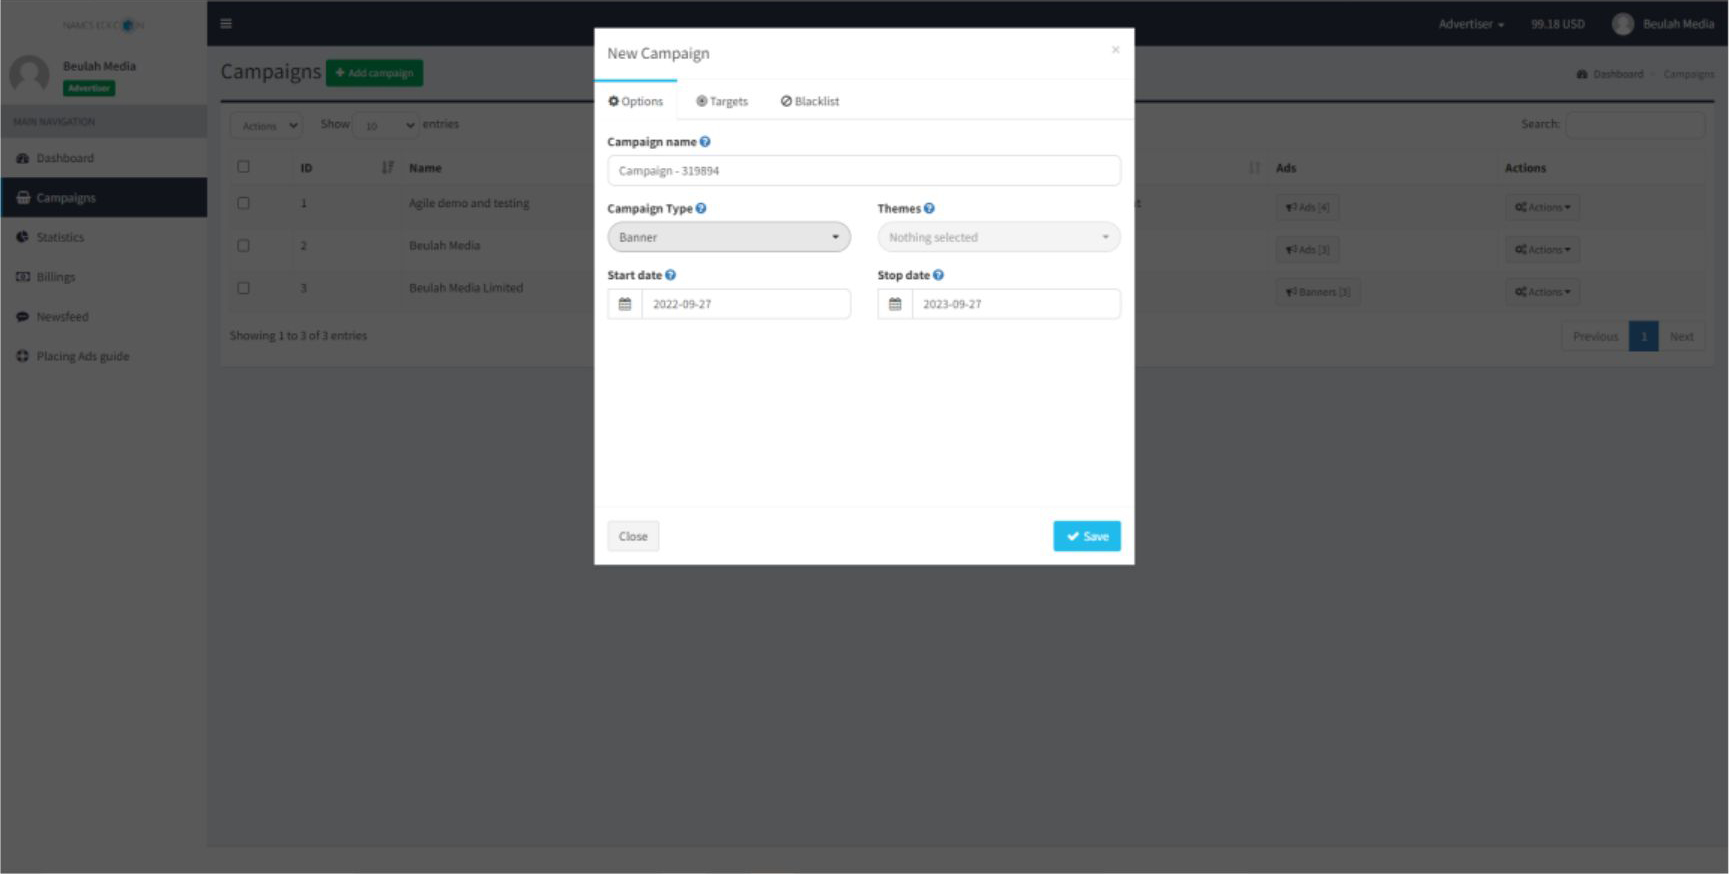
After funding your wallet, click on the campaign menu item and “Add campaign” button to add new campaign. There you will be required to fill in the information required to add a campaign for you advertorials.
Please note that you campaign type must be selected based on the preference of Ads you want to run. For ads that require only graphics, choose the Banner option as campaign type. And for ads that will require some text and even an action button attached to it, choose the Text Graphics option.
Step 5
After adding a campaign, your campaign is added to a list on the table showing the number of ads attached to a campaign, you can then click on the ads button to add an ad to be displayed on the platform to users or to be used by ad publishers on their websites.
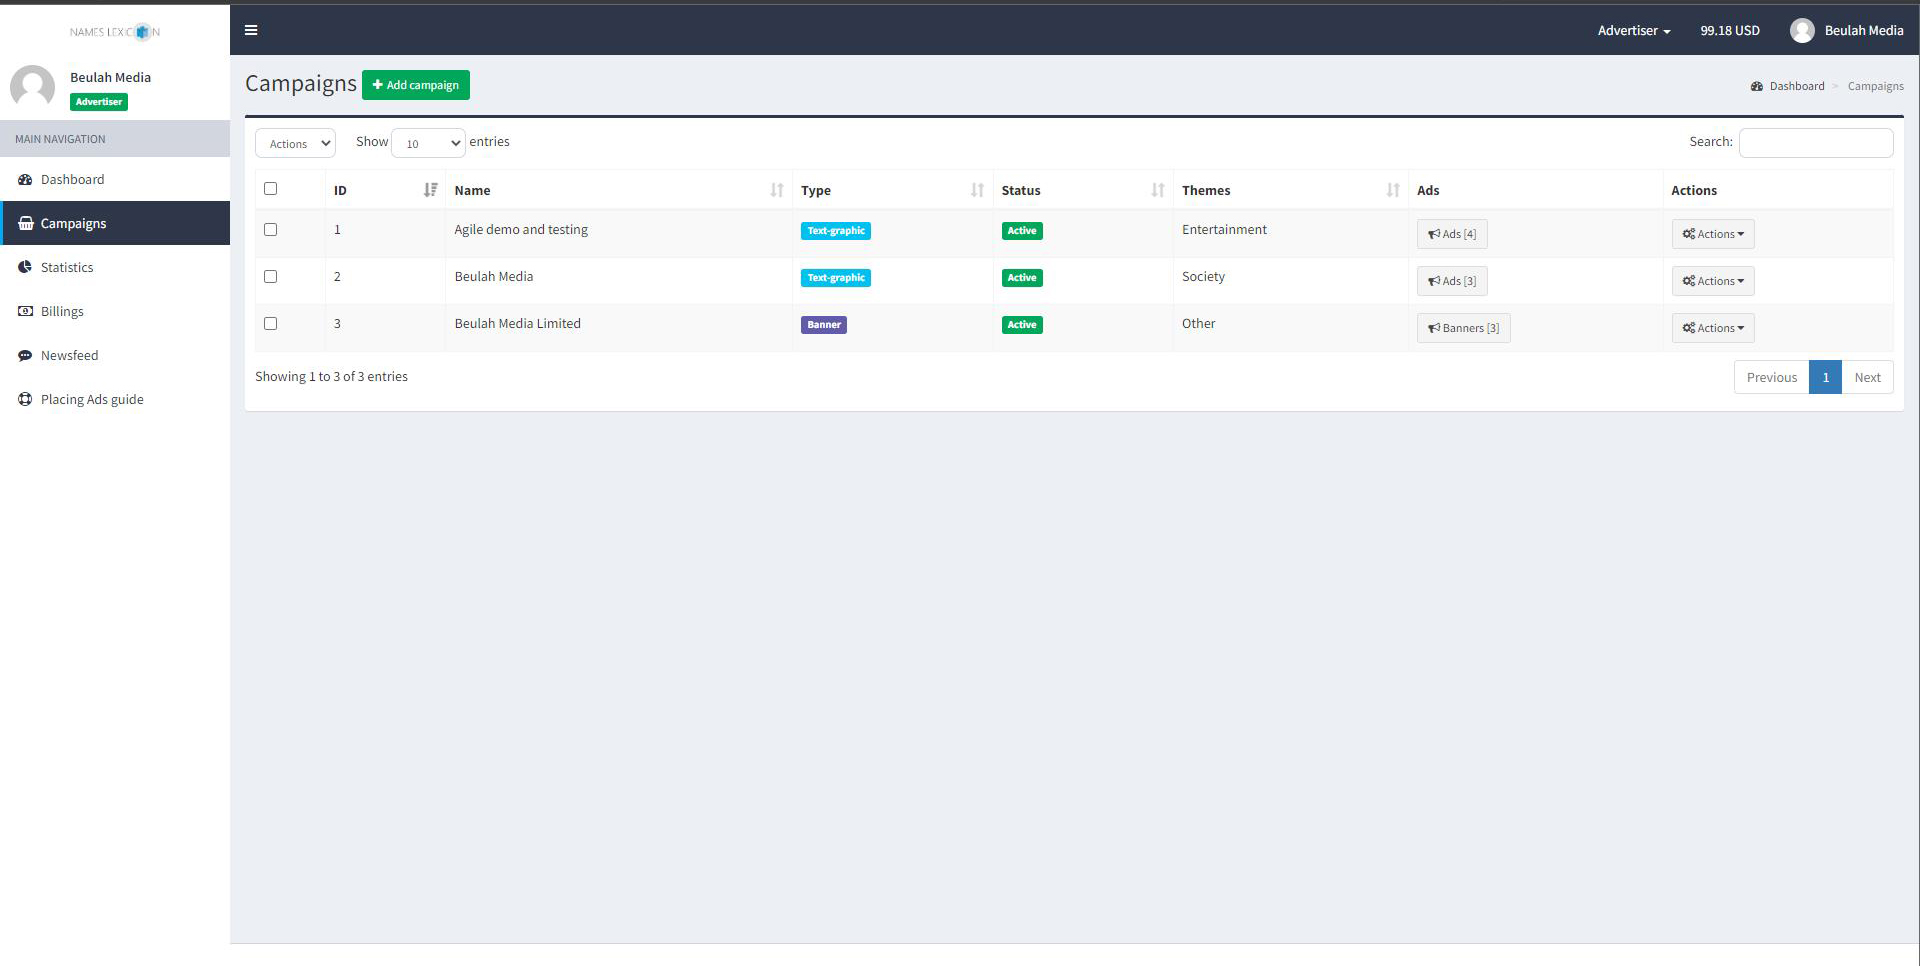
Step 6
Depending on the type of Campaign chosen, you will be required to fill in certain information for your ads including some images or graphics to be displayed to show your products or services.
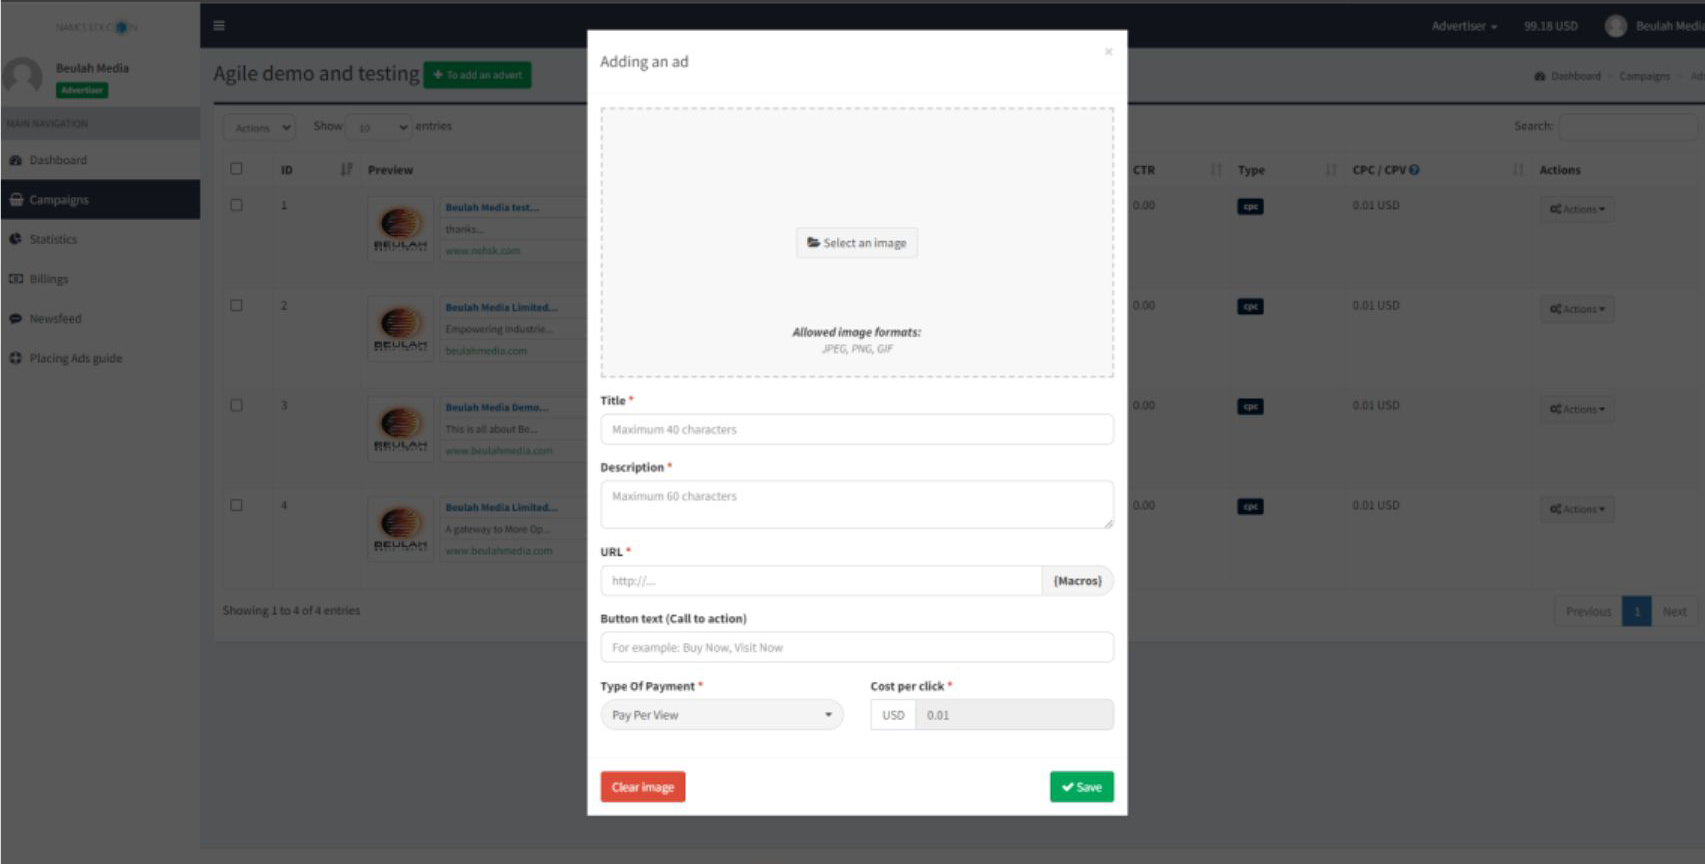
Text graphics Ads
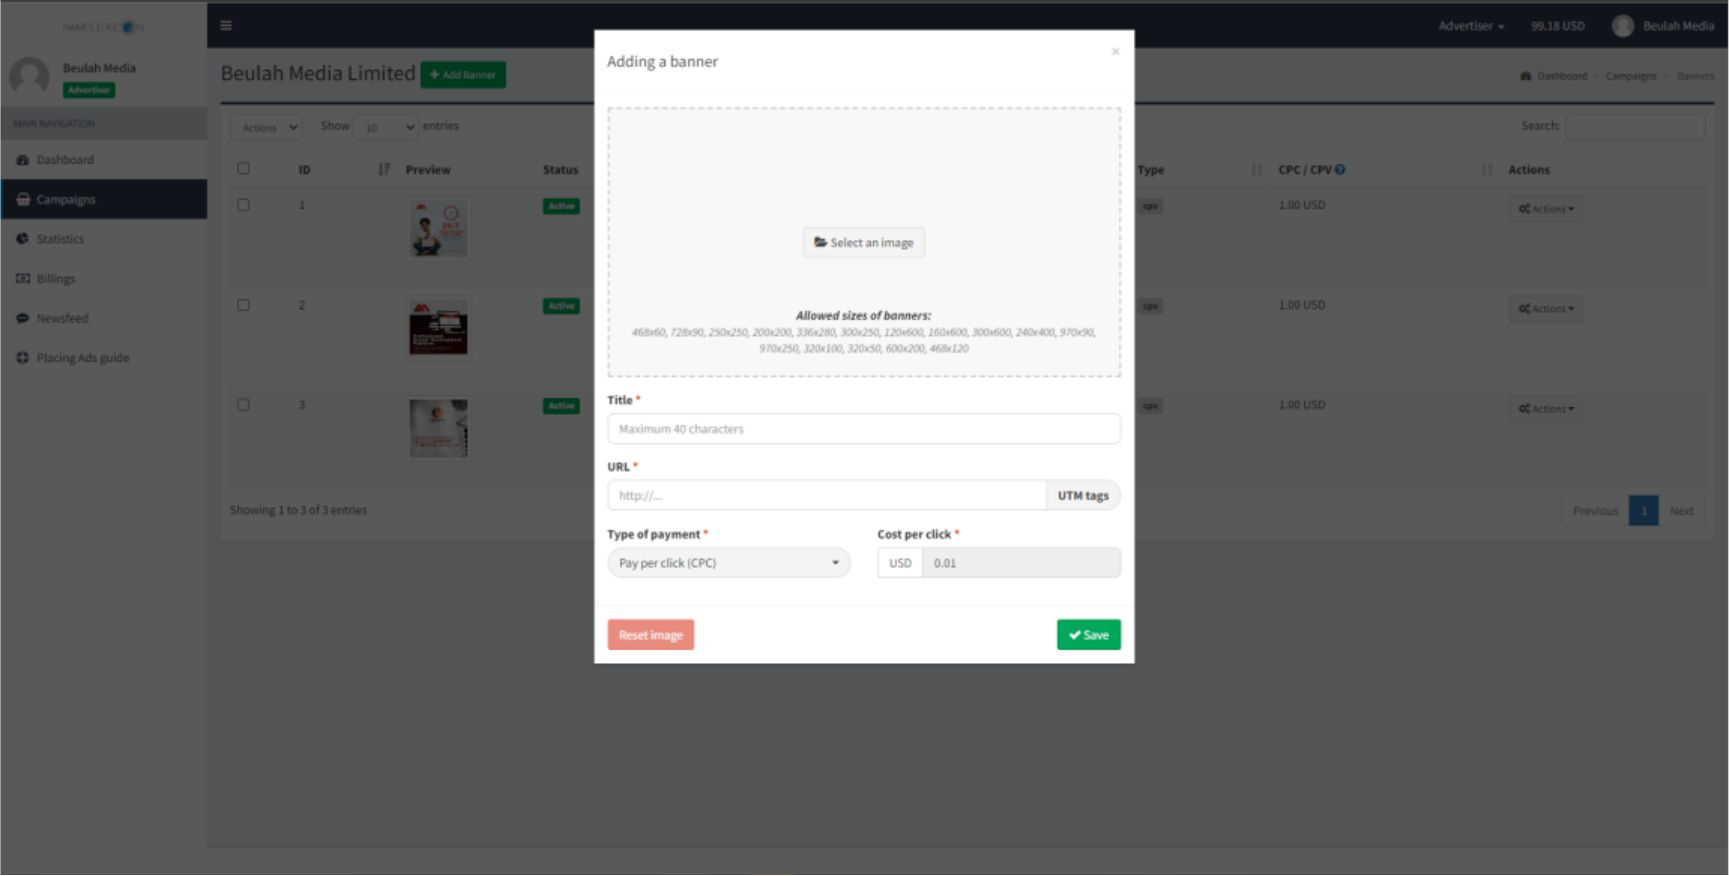
Banner Ads
Step 7
After adding the add, the Names Lexicon team then takes some time to look into the ad added before approving it to the public to be displayed.
Please note that your ad should not violate any of our policies or terms and conditions so that they don’t get rejected.
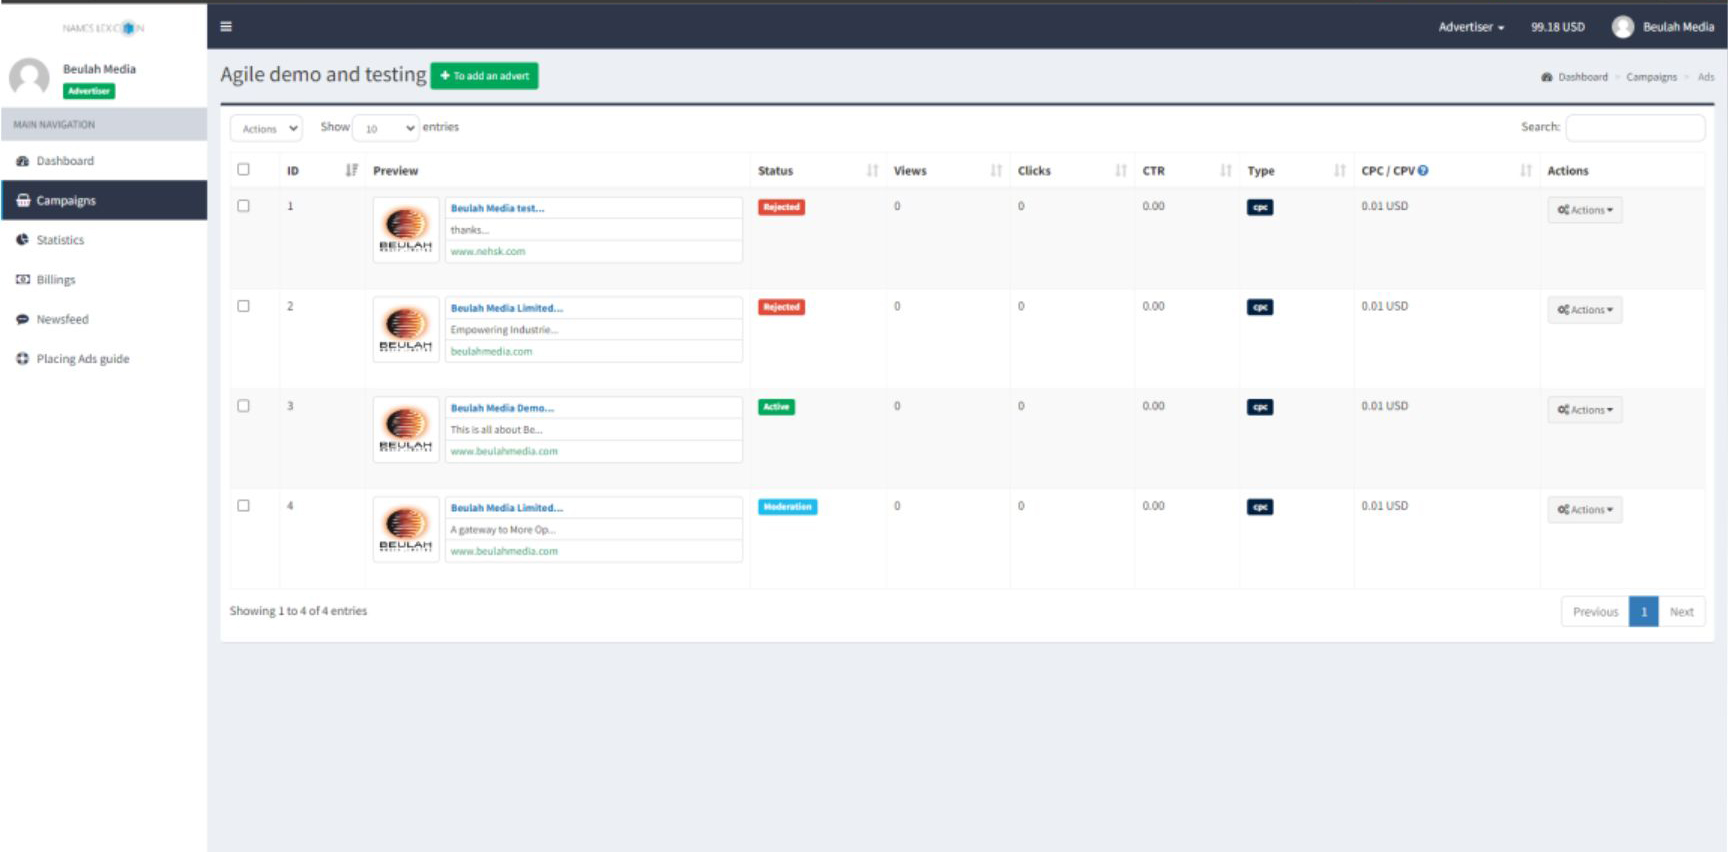
The Status column indicates the status of the ads added to your campaign
Moderation - Your Ad is being Reviewed
Active - Your Ad has been approve and is Active
Rejected - Your ad has been rejected for one reason or the other by the Names Lexicon Team.
Stopped - the user decides to disable his/her ad for one reason or the other.
Step 8
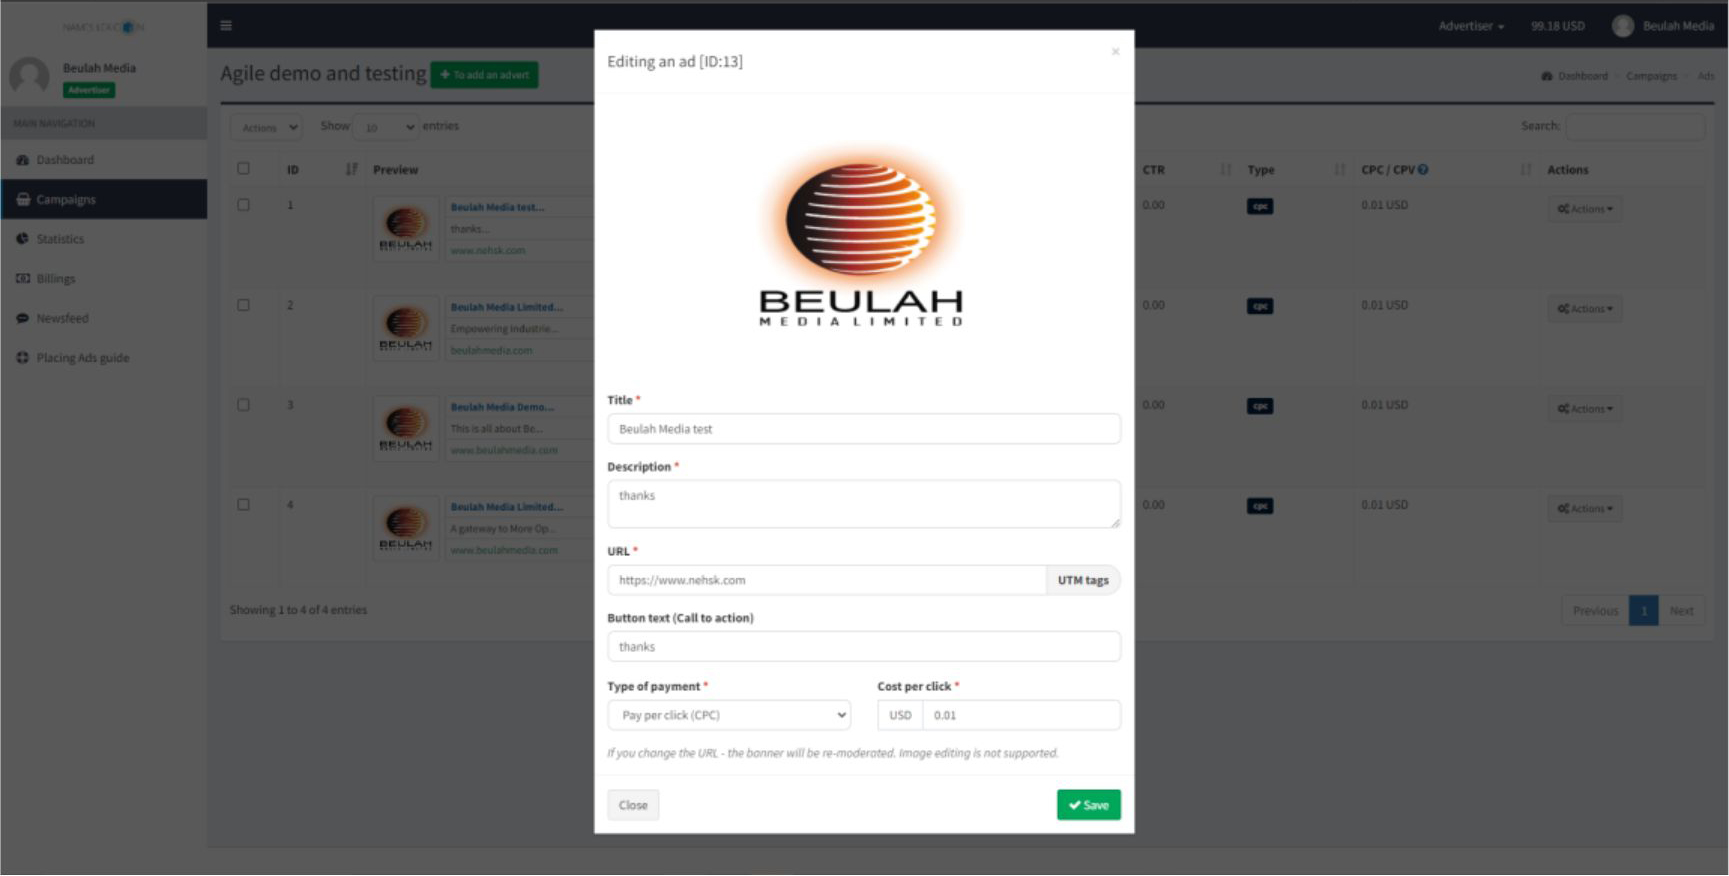
The action button in from of each ads allows you to view and perform some actions on each of the ads added including editing the ad information.
